November 21, 2024

Buying a second hand piano – practical guide

What to buy, a brand new piano or a second hand piano? This is the question so many people ask themselves once they have decided to buy a piano. What are the advantages and disadvantages, what is best? This article will try to dispel your doubts and help you to buy successfully.

Value for money
For those of you who the matter “value for money” is important, a good option to consider is to buy second hand. The piano pre-owned market is full of bargains but also is full of pitfalls “monkey business” (as a friend of mine always says), so is advisable to approach the buying of a used piano with extreme caution and to have at least some elemental knowledge

Where to buy
Look at the local papers on the “Musical instrument” sections, also at the online second-hand items sites like eBay, and of course at piano retailers and music stores. These stores usually have an array of used pianos which of course they are eager to sell. Some of these pianos can be in excellent condition and could represent an excelent buy.

Buying from a retailer
An important bonus to buy from a dealer is that they normally will offer you a guarantee, so in case there is something wrong with the piano, you know where to call. Other advantage is that they will transport the piano to your house for free, and will also offer you a free piano tuning (If they don’t offer a free tuning, don’t be shy ask for it, sure they will agree). All important things to have into consideration.

The appraisal of a piano
When evaluating a piano one of the most important things is to know how old is the piano. Whoever reads this blog regularly will know that the one who subscribes dislikes the very old pianos. Pianos over one hundred years have in general so many problems and are so expensive to restore that unless you are an antique lover or a do-it-yourself enthusiast, they should better be discarded. Strictly personal opinion, of course.

How old should be the piano
Preferably not too old. If you decide to buy second hand, the age limit should be no more than 30 or 40 years. A piano made in the 70’s or 80’s, if it has a careful owner and was regularly maintained, can be a good investment and still give you many years of trouble free enjoyment. Obviously it is better if the piano is only 10 or 20 years old, but the price undoubtedly would also be higher.

What is the best piano to buy? Well, that depends on each one.For general home use and an intermediate level of playing, I would go for one of the midrange well known makers with proven good value for money, something like a Yamaha or Kaway with no more than 20 or 30 years. Very good opportunities can be found in that bracket.

How to determine the exact age of a piano
How to know the exact age of a piano? All pianos have a serial number. If you know the piano brand name and the serial number, then is easy to know the age of the piano. Click here to know how old is your piano, or any other piano you might be interested. I will transmit you the information I have, for free. Take advantage of this offer while it lasts, probably not for long!! 

Where to find the serial number?
Where can I find the serial number? At the uprights, the serial number is located generally at the plate, up on the right (sometimes on the left or even at the center), you can see it easily by opening the front or upper lid. Serial numbers can also be located at the back of the piano, or somewhere at the action, sometimes at the soundboard.In grands, serial numbers are generally located also somewhere at the plate, but can also be stamped either at the soundboard or at the key frame.  Look for a number around five to eight digits, sometimes accompanied by one or two words.


                                            “PRACTICAL GUIDE TO BUY A  USED PIANO”


Step one
Take a good overview, what it looks like? The general appearance of the piano says much about the condition of the insides. A piano that has been neglected, with scratches, bumps and so on, probably has the action also in the same state. On the contrary, a perfectly lacquered piano, free of bumps and scratches, clean and bright, denotes a careful owner, that in the same way has been careful (not always) to tune and service the piano regularly.

If it is an upright that you are looking at, move the piano a bit from the wall and examine carefully the soundboard. Make sure there are not cracks and the ribs are solidly glued in place. The soundboard should be perfect, if that is not the case, bad news. This is an indication that other things could also be  in poorly condition, so be careful with that piano. In grands, you will have to stoop to look under. The same that has been said for uprights is applicable to grands.

Step two
The keyboard, examine it carefully. A perfect keyboard with all the keys well balance at the same height and with no irregular gaps between them is a very good sign. Sometimes keys (specially at the extremes of the keyboard) are burnt, as some piano players have the wicked habit of placing their cigarette butts right on top of those keys. Ohh!!

Now play every key up and down the keyboard, looking for sluggish action problems, broken keys and general action faults, like double striking or hammer blocking. If you don’t detect any of those things, then the piano action is in  good condition. If on the contrary, you noticed one or more of the faults mentioned before, then you can assume that the piano has have a good deal of wear and tear, and most likely needs regulation and replacement parts.

Step three
In this third step, you will use your nose, or better said, your sense of smell. Remove the front panel and open the top lid (we are talking uprights), lets “take a smell inside”. If it smells musty, bad news again. I personally wouldn’t go any further and leave the piano right there. Why?

Because is most likely that the dampness has affected the action parts, like hammers, felts, wood, and so on. Dampness, in case you don’t know, is the  piano’s number one public enemy (second one is excessive dryness), it’s effect on the piano is highly damaging and very difficult to mend once the damage has already been done.

Step four
Remove the front panel and take a good look at the action (if it is a grand, you will have to remove the action from the piano) The overall look of the action parts like backchecks, hammers, dampers etcetera, should be tidy and even. Take a good look at the backchecks and see if they are all level and more or less at the same distance. If that is the case, good, very good sign, as that give us an indication that the piano is in good shape.

On the contrary, if the backchecks are uneven and some hammers and dampers are crooked and/or wobbly, then beware of that piano, is evident it has have a lot of wear. And of course also out of regulation. Bringing that piano to good working order will most certainly be costly and time consuming. A piano in that condition also shows that the owner hasn’t been exactly careful and loving with his/her piano

Step five
Now we will look at the hammers. The hammers, as the tires in the cars can reveal much about the piano. Are they worn out? In that case you can estimate that the piano has had a long run, again bad news, as that is telling you that other elements of the action must be equally worn. Once here, also take a look at the dampers.

However, if the hammers are still round at the striking point (the part of the hammer head that strikes the string) without deep grooves, and still retain its original shape, then good news. If in contrast with the rest of the piano parts, the hammers look too new, then it could well be that the piano has had a new hammer set recently installed!

Take an overall look at the hammers with their shanks. Same thing as we said for the keyboard applies here. A piano in good condition should have the whole hammer section properly aligned with all the hammers at the same height and at the same distance from each other. Now, play the piano at the middle and middle upper part (which is usually the most worn) and see the hammer travel, making sure that every hammer strikes neatly its set of strings.

Double striking, wobbling and/or sluggish key action, hammer blocking (when a hammer doesn’t bounce back and gets block against the string), crooked and/or misplaced hammers, warped hammer shanks……etcetera, are simply not welcome!

Step six
In this sixth step we will be looking at the pins and strings. Same as the hammers, the state of strings and pins can tell you much about the condition of the piano. The strings and pins should be clean and bright without any sign of rust. Make sure there are not missing strings, specially the bass ones (quite difficult to obtain in case they are not there) A good second hand piano should always have its set of strings and pins well polish and in excellent condition.

Step seven
Finally, play the piano. Is on pitch and reasonably in tuned? How does it feel? This is a personal and quite subjective matter that varies from one person to another, but  the important thing is to feel comfortable with the instrument that you are playing. Ideally, the touch of the piano should be not too soft, not too hard, with a pleasant feel and a proper dynamic response.

If the piano is badly out of tune, it doesn’t say much about its proprietor and how he/she care about the piano. I would recommend before buying, to have a professional tuner to look at the piano (specially if it is an old piano) this is to ensure that the piano is tuneable and to discard any major fault like a broken pinblock or iron cast plate, a crack soundboard and so (things that are not easy to see at first glance)

If the piano bears any of those major faults mentioned before, unless the piano is one of the major brands, like C. Bechstein, Bösendorfer, Steinway, Blüthner, Mason & Hamlin and the likes, then the best thing to do is to refrain from buying and look elsewhere. Why is that? Because nowadays, the cost of piano restoration is so high that in general is not worth it.

Summarizing
these seven steps guide will give you a good idea of what you are buying and will let you evaluate the condition of any piano. At least it will prevent you from getting it miserably wrong and making a serious mistake. Don’t be taken for a ride and buy the right piano at the right price and in the best possible condition, that’s the goal.

If not too sure about a piano and a fair amount of money is involve, I highly recommend you to use the services of a pro technician who examine the piano in depth and advise you. By the way, if you do so, and decide to buy the piano from a retailer, make sure the piano tuner (that supposedly will advise you) doesn’t work also for that same dealer. Just in case….!!  

© Copyright Juan Olalla 2010.  All rights reserved   www.howtotuneapiano.com

Important notice:  Reproduction of this article (or any other article contained in this site) in part or in whole is strictly prohibited, unless permission is given directly by the copyright owner. Contact Juan Olalla at: [email protected]

Has this article been helpful to you? You are welcome to leave a reply. Your opinion and/or suggestions are highly appreciated. Thanks
 

Piano tuning procedure

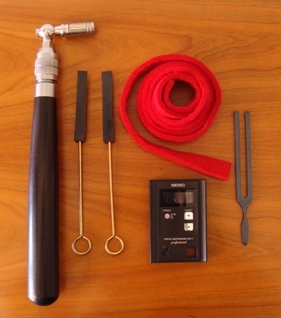
Learn to tune a piano aurally, what follows is the standard protocole. First of all, you will need some basic tools, these you can buy at any online tool suppliers on the internet. You could buy everything as a piano tuning kit or you can buy them individually.

What ever way you choose, make sure you buy the right tools. If possible try to buy good quality piano tuning equipment, that way you will have better overage results and your tuning will be easier and more accurate.

Piano tuning tools 
A set of basic piano tools is not too expensive, certainly no more than a standard professional tuning.The first thing you obviously need to learn to tune pianos,  is a piano in a reasonable good state. Bear in mind that some very old ones specially if they still have wooden frames are simply not tunable, so better disregard those ones as they will make the tuning very difficult or practically impossible. The piano can be old but must hold the tune, that means it must be in a good enough condition to stand a standard A-440 tune and hold it for some time. Also better to choose a good size one. Big uprights and grands are easier to tune than spinets and small uprights.

  • The tuning lever or hammer
    A whole chapter could be writing about the tuning hammer, this is the most important piano tuning tool. I think you could consider to buy a good one, no doubt it’s a good investment. The extended ones with changeable heads and tips are the best ones. A good tuning lever is far better than an ordinary one, makes the job easier, more precise and professional.
  • The tuning fork and two rubber mutes
    An ordinary tuning fork A-440. You can buy them at any musical instrument shop. The tuning fork produce an exact pitch that you will use as a basic reference. The rubber wedges you can buy or make then yourself. The utility of these simple rubber wedges is to mute the strings we don’t want to hear.
  • Felt temperament strip
    Better to have a couple of these. They are strips of felt about two or three millimetres thick by two or three cm (one inch) wide and about a meter long. We will need then to set the temperament which is the first thing we do when tuning a piano.
  • A  metronome
    Any metronome will do, but one of those small digital ones would be perfect. A metronome will be very handy in early learning so that we can practice and check the accuracy of the beat rates we use when tuning a piano. When we are accustomed to hearing and recognizing the beat rates, then will not need the metronome anymore. 
 
                                         TUNING PROCEDURE – SETTING THE TEMPERAMENT
 

Disclaimer: What follows is a basic and general information procedure for tuning a piano. To view the full protocol and specific piano tuning instructions, please refer to eBook “How to tune a piano”

The temperament, setting the temperament
The temperament could be defined as a group of notes in the center of the keyboard, stretching approximately one octave (normally from F33 to F45 or from F33 to A49) that are tuned in a certain way. Once the temperament is set we will use it as a reference to tune the rest of the keyboard.
 
Setting the temperament is the most important aspect of tuning. The quality of our piano tuning depends a great deal on how well the temperament has been built. Although setting the temperament is not really complex, its study required some time and practice. Time well spent I would say, as once learned, you can apply to every tuning you will make in future.
 
Basically there are two groups of temperaments. In one hand the ones that use mainly fifth and fourth intervals and only third and sixth intervals for testing. The other group of intervals on the contrary utilizes mainly third and sixth and only fifth and fourth to check and evaluate. In my humble opinion, the second group is better. Why? Because the third and sixth intervals produce faster beat rates, about 7, 8 and 9 bps (beats per second), generally easier to listen and judge. In contrast, the first temperament group, the one that uses mainly fifth and fourth intervals, generates slower beat rates, which for most of us are significantly harder to recognize. 
 
  • First step
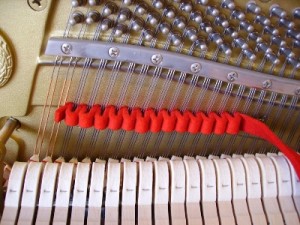
    Mute the unisons Mute with a felt strip the side strings of every unison from F33 to F45 (see the picture above). Leave unmuted the center strings as this will be for now the only string of every unison in the temperament that we will tune.
  • Second step
     Using the tuning fork Tune A4 to its theoretical standard pitch 440 htz. You will need a chromatic tuner with speakers that can generate that frequency or an A-440 tuning fork.
  • Third step
     Tuning the temperament.  Now tune the temperament. The standard way to tune the temperament is using third, sixth and fifth intervals and tuning them to specific beat rates, save fifth and fourth interval for testing. If you prefer or feel more confortable, you can do the other way around as there is not rule of thumb in this matter. At this stage, the center string is the only string at every unisons in the temperament that you will tune.
  • Forth step
    Tuning octaves. Tuning octaves is fairly simple. Tuning hammer on F#46 (mute the side strings with a couple of rubber wedges). Strike at the same time F#34 (already tune) and F#46. Tune till you eliminate all audible beats and the two notes sound as a single one. Then tune G47 in the same way and carry on tuning every note towards the upper end of the keyboard. When tuning the bass section apply the same procedure.
  • Fifth step
    General review Review and test what you have just done so far. Take special attention to the unisons as they are the ones that first go “out of tune”. Try to eliminate all the audible beats or at least get them as beatless as possible. A good hammer skill would be handy at doing so.

Doing the stretch
It’s a matter of fact that a piano sounds better when its upper section and low section are stretch. That means that the high notes (more or less the last two octaves) are tuned sharper than theoretically they should, and the very low notes tuned lower than they also should be. You could ask, why is that? The reason is that a piano tuned in that way simply sounds better. That is commonly accepted, so an experience technician should do what is called “the stretch”.

The “stretch” is tuned exponentially, that means that the stretching becomes more and more pronounced as you advance up the keyboard There are theoretical tables that allegedly determined the amount of “stretch” for every key, but that’s all. In this matter like in many others involving piano tuning there is not rule of thumb, and in reality every tuner do the “stretch” at his/her discretion. I think, to be precise, when in the lower notes the stretch shouldn’t be call that way, but the “shrink”, as that’s what really happens. 

To do the “stretch” you will need some practice and experience. If you are newbie to piano tuning I don’t recommend you try doing the stretch, at least not for now. Just wait some time till you are reasonably proficient.

Important notice:  Reproduction of this article (or any other article contained in this site) in part or in whole is strictly prohibited, unless permission is given directly by the copyright owner. Contact Juan Olalla at: [email protected]

Has this tutorial been helpful to you? Do you have any questions? You are welcome to leave a reply. Your opinion and/or suggestions are highly appreciated. Thanks
© Copyright Juan Olalla 2011  All rights reserved   www.howtotuneapiano.com


Sharp and loud piano… learn how to get a mellow and smooth sound

One of the things that I am frequently asked is how to change or alter the sound of a piano, specifically how to correct the sound of a too harsh and metallic piano to make it sound smooth and mellow “European style” kind of sound. Is this possible, how do you do it?

Well, the answer is yes but you must take into account some considerations. First thing first, why do so many people are interested in changing the tonal quality (sound) of their pianos? In my view, because most pianos low to medium quality nowadays are manufacture in Asia (mainly in China) and one of the characteristics of such pianos is their particular sharp and loud sound, maybe suited to the tastes in that part of the world, but not so much for European and American ears.

The sound of a piano is determined by its construction and the materials it is made, specifically, the quality and type of the soundboard, the scale design, the type and quality of the strings, and the iron frame. But mainly, what sets the “color” of sound (say up to 50%) are the hammers, and is precisely the correct handling of the them that allows us in a certain degree to alter the sound of the piano.

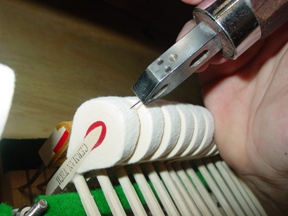
The manipulation of hammers to change the sound of a piano is called “Voicing”, also commonly known as “needling the hammers”. Voicing is undoubtedly the most delicate and subtle aspect of piano regulation, and requires fine ear and a good dose of patience. Normally this is a job for the competent technician, but I think that crafty and motivated amateurs can also try the technique, providing (of course) they proceed with caution.

In short I will explain what is all about. The basic principle is to alter the fiber density of the hammers (a hammer with less fiber density sounds mellower) and the way to proceed is basically by shallow puncturing (no more than 1.5 mm. deep) with a needle, the area of the hammers that hits the strings (about 1 cm. wide). Puncture the hammer just a little (6 or 7 times), test the sound, and puncture again till you are satisfied with the sound, repeat if need it be and then move to next hammer. It doesn’t sound too difficult, does it?

The brave and bold of this world who wish to try this technique, please follow these recommendations:

      • Before you begin, apply a light sanding on the hammers tips. Do no more than 6 or 7 punctures at a time, then test the sound.
      • If after 3 or 4 sessions of 6/7 punctures you don’t hear any difference in the sound of that note, stop and leave it there. If you carry on needling, you risk damaging the hammer!
      • Grab the hammer solidly but gently, you don’t want to damage or break the hammer shank or the flange.
      • Before applying this voicing technique, as far as possible is advisable to gain some experience by practicing in a low cost old piano.

To those of you truly interested in this topic, I would recommend reading in depth Chapter VII of my book “How to repair a piano” where is explained in detail the voicing technique and its specific step by step procedure.

© Copyright Juan Olalla 2011.  All rights reserved   www.howtotuneapiano.com

Important notice:  Reproduction of this article (or any other articles contained in this site) in part or in whole is strictly prohibited, unless permission is given directly by the copyright owner. Contact Juan Olalla at: [email protected]

Has this article been helpful to you, do you have any question? You are welcome to leave a reply. Your opinion, comments and/or suggestions are highly appreciated. Thanks

How much money can make a piano tuner, is it profitable?

Is it profitable to tune pianos? A few days ago, looking the statistics at the control panel of this site, I saw an interesting phrase by which somebody found us in the Google search engine. This was the phrase: Is it profitable to be a piano tuner?

It seemed such a good question that I immediately started to write this post. Of course the question does not have an easy answer, since the matter depends a great deal on the individual. In my case, I never entered this profession with the idea of making money, but by pure interest and fascination in the world of pianos, and humbly I must admit that although obviously I never became a millionaire; I managed to make a decent comfortable living.

I always have thought that if somebody engages in something with real enthusiasm and commitment, sooner than later things will roll your way and eventually this will translate into economic gain, even without having sought it. However I am not so sure that in the reverse order, that is engaging in a profession with the sole purpose of making money, will produce the same results. The profession of piano technician is no doubt one of the most beautiful and interesting careers that exists, especially if you have a genuine interest in music and arts in general.

The profitable potential is of course there, within your reach, but as in any other trade, the competition can be somewhat strong. At the end of the day, are the competent, honest and skillful piano tuners, the ones that are more in demand, and obviously the ones that will get a higher income. There are three types of people who tune pianos.

The first group is the ones who play piano for pleasure and learn to tune pianos in order to tune their own piano. Usually they are perfectionist people who like to have their piano always in tune and obviously not bother saving the money that costs calling regularly a piano tuner.

The second group consists of people who tune their own piano but also dare with others (friends, family, and so) pianos, making from piano tuning a part time profitable activity. I think this is the largest group, I know quite a few people who have a regular job and also tune and repair pianos for money at weekends and in their free time.

The third group is the full-time professionals, usually people who have been in this trade for many years and have a considerable level of practice and experience. Many of them (myself for example) have converted their hobby into a full time job. Net income of these “pros” (as in any job) varies according to circumstances and personal competence.

So, to be specific we could calculate the monthly income of a busy full time skillful piano tuner around 3 or 4 thousand Euros, which roughly makes around 5 thousand USD. If we are talking about a part time “amateur”, the monthly income could be something from a few hundred up to 1 or 2 thousands. Which by the way, wouldn’t allow you to buy the Ferrari, but never the less will let you lead a reasonably comfortable life.

I truly believe that if you have a real interest in this fascinating topic and would like to deepen your knowledge and follow a career as piano technician, my books “How to tune a piano” and “How to repair a piano” will be of great help and a very positive asset for you to achieve your goals. https://howtotuneapiano.com/blog/?page_id=70

© Copyright Juan Olalla 2011.  All rights reserved   www.howtotuneapiano.com

Important notice:  Reproduction of this article (or any other articles contained in this site) in part or in whole is strictly prohibited, unless permission is given directly by the copyright owner. Contact: Juan Olalla at [email protected]

Has this article been helpful to you, do you have any question? You are welcome to leave a reply. Your opinion, comments and/or suggestions are highly appreciated. Thanks

Digital piano or acoustic piano

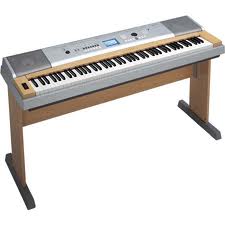
Can you study piano in a digital piano keyboard? Digital versus Acoustic.
Time ago, while examining an old piano owned by a lady who wanted an estimate to decide if it was worth it to repair, she came out with this question: Is it possible to use an electric piano for a child who is going to take piano lessons for the first time? Can you study piano in an electric digital piano?

What a question for a piano tuner! Clearly the lady was pondering the possibility of buying a cheap digital thing in case the estimate for repairing and tuning the old piano was too high. I don’t have the habit of cheating my customers, but neither I am fond of throwing stones over my own roof. Sometimes truth match our own interest, and this was one of those rare occasions. So, sure not to be bias and well in peace with my concious, the answer to the odd question was obviously: (yes, you guessed it), No!

 Undoubtedly digital pianos have qualities that make them attractive to many people. For example, its lighter weight and smaller size makes them easier to handle and place them anywhere in the house. They never get out of tune and don’t need servicing. Can easily change pitch, so you don’t need to transpose. Can play orchestral sounds, make rhythms and even record and reproduce what you play. Anybody can become an accomplish pianist just by pressing a key….! Or at least that’s what it appears.

Comparing the impressive array of features that digital piano has with that of the acoustic one, becomes clear that the digital piano wins by a landslide. So, what strange reason could motivate somebody to buy a traditional piano instead of a digital one? What disadvantage has the digital piano, if any?. Well, actually just one, and that is that the “digital piano” is not really a piano.

 In my humble opinion, the term “digital piano” is inherently wrong and leads to confusion. Perhaps traditional piano makers shouldn’t allow “digital piano” makers to use the name “piano” to market their products. Same as they do with wines and cheeses producers, to ensure the authenticity of their products and guarantee its proper designation. No kidding, I’m serious. From here I propose the idea.

A real piano is made by craftsmen. Noble materials are used in its construction, different types of wood like mahogany, walnut, ebony, spruce etc. Also, steel, brass, leather, felt, ivory for the keys (no longer used) and so on. Its operation is completely mechanical or “analog” as they say now. The experience of playing a real piano has nothing to do with that of playing a digital instrument. The gentle subtle touch of the keys, the full rich authentic sound (even with its imperfections), the warmth and the feeling that conveys, the looks, the smell of wood, and so on. No, it is not comparable at all. Maybe I am a romantic, but I prefer the touch of wood rather than plastic.

In contrast, a digital piano is really a computer with added keys, cold and with no soul. It’s sound, although it can be nice, does not have the wrapping richness and tonal quality of the real thing. For the piano player, a major drawback of digital pianos is it’s poor key touch. Although some digitals try really hard to replicate the keyboard dynamics of acoustic pianos, never comes near as good as the authentic thing. In brief, from a serious musician point of view, a digital piano is a poor alternative to a real piano

Another very important point to take into consideration is the durability and life span of the instrument. An acoustic piano is very strong and good quality ones are made to last a long long time. Providing you take a minimum care (just tuning once a year), your piano will last a life time. The piano  becomes a member of the family and can easily be passed to the next generation. I have known pianos dating from the 20’s (last century) in pristine condition.

On the other hand,  an electric piano that is played reasonably often, will only last a few years. As it happens nowadays with any electric appliances, digital pianos are made so that they will be broken soon. Guess way? so that you buy again, naturally. The fact is, a digital piano can not take the heavy pounding of an acoustic piano. In the life span of a decent acoustic you could end buying a good number of electric ones. So, where is the saving?

So, going back to the original question, can you use an electric instrument to study piano? I sincerely believe than using an electronic keyboard to study piano is not advisable. I think it is important for the student to get accustomed from the beginning to play and appreciate the subtleties of a real piano. Also, it is a fact that a good instruments motivates the piano student and improves the rate of success in piano studies.

Probably you have guessed by now that am not precisely a digital piano lover… Then, is this a hatchet to digital electronic keyboards motivated by the obvious corporate interest? Not really, the idea is to objectively clarify the points. Neither digital pianos can be compare with real acoustic pianos nor real pianos can be compare with the digitals. This is so simply because they are different things for different purposes. Long life the piano!

Copyright © Juan Olalla 2011

Has this post been helpful to you? Do you have any question? You are welcome to leave a reply, your opinion and/or suggestions are highly appreciated. Thanks


Fast piano tuning, the tricks of the pros

Need to tune a piano in no time? Then this article is for you “The makeshift piano tuning tutorial”. Solve the problem of a badly out of tune piano, at least while you call the tuner or even better, till you learn how to properly tune your own piano. The only thing you need is a tuning lever and two rubber wedges.

Disclaimer: What follows is a general information tutorial on how to tune a piano in an emergency situation. In no way this should be considered as an accurate and  professional work. To know more about this topic and view the full protocol, please refer to ebook “How to tune a piano”,  Chapter VI and VII.

 Although this can only be consider as a rough-and ready kind of piano tuning, it can improve quite a big deal the sound of an out of tune piano. In this “unorthodox” way of tuning your own piano you will not have to set the temperament, just take care of the unisons. Learning to do this basic piano tuning is an  excelent exercise and prepare you to undertake the standard method for tuning a piano like a pro.  

Reasonably often we encounter pianos that even they are not “terribly” out of tune, have a few keys that stand out by its sound offensively lousy. Every time we press any of those keys the effect “out of tune” is particularly relevant.

The problem is that the frequencies or pitches of the strings that form the bichord or threechord for that tone don’t match one another and therefore that very unpleasant out of tune effect. Some particular keys just  yells and meows like a cat.

The threechord (also call unison) are three strings that correspond to one note or key of the piano. Approximately two thirds of  a piano keyboard (the upper section) are threechords). These unisons should be tune at exactly the same pitch. That means when you strike a note perfectly in tune, it shouldn’t produce any pulses or beats, and the three strings that correspond to that key should sound as a single one.

On the contrary, when those three strings that correspond to an unison are not tuned at exactly the same pitch, produces that shrill and unpleasant sound we all know too well. To mend this nuisance is relatively simple. The modus operandi or at least the way I have always done it is as follows:

Step number 1
Remove the piano lid so that you can see the action (sorry for describing the very obvious, but you never know who is reading).  Now play the key that you want to tune (for example middle C) and try to identify the threechord (or bichord) that corresponds to that particular key.

Step number 2
In this step you will select one of the three string to use as a reference to tune the other two. To do this, press the sustain pedal in order to lift the dampers so that the strings are unmuted, then play one by one each string with the nail or a plectrum while also playing the same key on the upper and lower octave. The idea is to decide which one of the three strings is better in tune and therefore the one to use as a reference.

Step number 3
If in doubt, chouse the string in the middle. Ok, just imagine you have selected the center string as your reference. Now using one rubber wedge or anything can serve for the same purpose, insert it so that you mute the left string. If we do this right, when we strike the key it will sound only the center and right string, not the left one as it is muted.

Step number 4
Follow the right string upward till you find its pin and put the tuning lever there. Now play middle C (the key that we are tuning) and listen carefully, you should hear a kind of  wou wou sound changing in intensity, this we call beats or pulses. Our objective is to remove this pulse, so that the two strings are beatless and sound as a single one.

Step number 5
Grab the tuning hammer firmly and twist it gradually counterclockwise (just a tiny fraction) noticing how the beats go faster till eventually disappear. If you twist the tuning hammer too far you will not hear any beats and the two string will sound as two different tones. We only hear beats when the pitch of the two string that we are tuning are quite close.

Twist the hammer clockwise and you will start hearing beats again. Gradually twist the tuning lever  noticing how the pulses slow down till they eventually disappear, then the string is tuned. At this stage you will probably  have to manipulate and adjust the tuning lever clockwise and counterclockwise by fractions in order to set the pin solidly. As we said before, the goal is to eliminate all audible beats

Step number 6
 Now that we have got the right string of our unison in tuned, you will tune the left one. Using the rubber wedge mute the right string, so that when you strike the key, only sounds the center and the left string. Put the tuning hammer on the pin for the left string and proceed as you did before till there are no beats

Step number 7
Remove the tuning lever and play the key. It should be in tune, and the three strings of the unison all at exactly the same pitch. Middle C should sound now neat and clear, without any of the previous unpleasant beats. If still not quite right, go back to step 4 and do it all over again. Repeat the same process for any other key on the piano which stands out for its particularly lousy sound.

Very important:
Make sure that you got the right pin, otherwise you could very easily break the string.
Check and double check before you start twisting the pin. Listen carefully. Remember, what we try to hear are pulses or beats not musical notes. Grab the tuning lever firmly and twist it with extreme care, just a fraction of movement is enough to alter the pitch. Don’t forget to strike the keys solidly, that’s the way to set the strings so that the tuning will last longer.

Doing this for the first time might seems difficult but it is not really, just take a bit of practice. I think it is harder to explain than to do. Good luck.

©  copyright Juan Olalla 2010 

What do you think about this article, has it been helpful? You are welcome to leave a reply. Your opinion and/or suggestions are highly appreciated. Thanks

My eBooks to tune and repair pianos

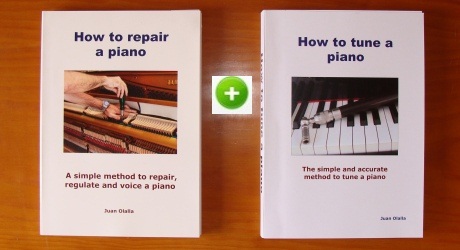
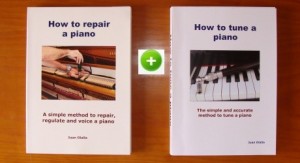
Tune pianos like the pros do and learn the “tricks of the trade”. These two books teach you in an easy and simple way all you need to know to tune pianos aurally, also to regulate, voicing and repair the vast majority of faults you can encounter on a piano.

Most people think than repairing and tuning a piano is a very difficult task, a job that can only to be carried out by people of the trade. The reality is quite different, providing that you follow the right teaching method, you can learn to tune and repair pianos in a relatively short period of time. Buy these two books now and learn in no time to efficiently tune and repair your own piano.


Learn to tune and repair pianos like a pro


"How to repair a piano"

$29,95 USD

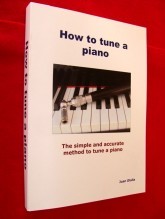
"How to tune a piano"


$29,95 USD

132 pages divided into 7 chapters covering the main issues

Step by step simple instructions excluding unnecesary theory
More than 140 photographs and helpful diagramsNumerous photographs, charts and helpful diagrams
Numerous tips, shortcuts and personal first hand advicesMp3 sample of the "beats" will show you easily how to build the temperament
Full dedicated chapters covering areas as Regulation and VoicingDedicated chapters covering tuning hammer technique exercises
A check-list for quick reference with the piano most common failurePlenty of tips, shortcuts and first hand personal advices
(More about this book....)(More about this book....)

Buy the two eBooks Now and save a 15% - Instant download!


$50,92 USD

”How to tune a piano” free download (extract) please click here

”How to repair a piano” free download (extract) please click here

 
About these eBooks
The author of these works knows from personal experience the difficulties that someone with the desire to learn can find. I never have liked the secrecy that has always surrounded this trade, and the little inclination that piano tuners in general have to share their knowledge. These eBooks represent a new approach, a simple and fast, step by step method.

Can I tune and my own piano? Yes, you can. There are many people who for a variety of reasons want to learn piano tuning and repairing, but the complications of ordinary methods, make the task little less than impossible. It’s a fact that most malfunctions on the piano are easier to mend than they look at first sight. Good observation skills and a good dose of patience backed with a minimun theoretical knowledge is about all you need. These digital books are designed to learn how to tune and repair pianos the quickest and easiest possible way. You learn step by step as if you have a teacher next, focussing only on the elements really important. The experience of three decades tuning and servicing pianos squeezed into two simple and practical methods.

 What is the price of the books and how can I buy them
The price of each book is $29.95 USD, and if you buy the two books $50.92 USD (15% discount). Clicking on “buy now” you will be redirected to PayPal where you will be able to pay safely by credit card or bank transfer. Once the payment has been accepted, you will recieve an email with a link to download the book. The whole process doesn’t take more than a few minutes.

Is it safe to pay transactions online by PayPal?
It is completely safe. PayPal is the company leader for payments online, having more than 250 millions clients. The data in your credit card are encrypted and the seller does not keep any information from it. Buy with confidence.

Something about the author of this books
The author of this book is a professional piano technician with over 30 years experience. Having work most of his professional career in England and Spain, nowadays Juan shares his time between his job as a piano technician and teaching of piano technology.

Can I really learn to tune and repair pianos with these books?
Yes, nowadays two thirds of the people who learn to tune and repair pianos, they do it by their own means. A piano tuning method like “How to tune a piano” and “How to repair a piano”  makes the whole process of learning, simple and easy, not fuss, straight to the point. With this book, any adult person with some basic musical concepts, can learn to professionally tune and repair pianos in a relatively short period of time.

What makes special these books 
Is the inclusion of audio visual material. The student not only reads, but also listens and learns by the mp3 files inserted in the book. This way you will soon be able to accurately identify and judge the pulses and beat rates needed to tune a piano.

Can I print these books ?
Yes, once you’ve downloaded the book and saved it in your computer, you can print it in order to have a copy for your personal use.

Any questions? Please, post us a comment.

About How to tune a piano eBook

The book “How to tune a piano” is made with the aim to teach you to tune pianos the easiest and straightforward possible way.
In brief, create a short cut that goes straight to the point. To achieve that, I have deliberately reduced the theory to a minimum, focusing only on the essentials. I have tried to do this the friendly way, imagining that the student is learning next to me and offering comments and advices based on the experience of so many years.

I thought specially on the people that without any previous experience want to learn to tune pianos as a hobby, to tune their own piano or engage in piano tuning as a full or part time profitable and rewarding activity. Also in the experienced professionals that want to update their knowledge or compare their methods with the ones used by other colleagues. Overall, I am confident this book will be useful and beneficial to any music lover interested and curious to know about pianos.

“How to tune a piano” buy and download Now!

$29,95 USD

 
“How to tune a piano” main Features

  • Step by step simple and easy to follow instructions
  • Numerous photographs, charts and helpful diagrams
  • mp3 samples of the “beats” will show you how to build the temperament
  • Dedicated Chapters covering tunning hammer technique exercises
  • Plenty of “tips”, short cuts and first hand personal advices

What makes this book special

Is the inclusion of abundant audio-visual material. The student not only read and see the plentiful descriptive colour pictures, but also hear the mp3 sound files which are embedded in the book.
Steps like tuning octaves and unisons, the building of the “temperament” and the practice chapter are accompanied by their respective sound recording, so the student not only read, but also listen and know exactly what to do and how. This advantage let you learn to tune a piano in much shorter time than any other method.

Testimonials


Dear Juan,
I found your book excellent, It is very comprehensive and covers all that a beginner would need to know. Overall it is beautifully presented and I find no fault with it at all. The photographs are very clear and are more than useful to the explanations in the text. It makes me feel confident to have a go myself.
Tom Robinson (England)

Hi Juan,
I have read your books and I think they are very well written in that it is comprehensive with the right amount of detail and helpful diagrams. For those who want to learn to tune and repair pianos, your books will be very useful.
Howard Lock (UK)

Table of contents


Chapter I: Basic tuning tools
This first chapter is devoted to the basic tools to tune a piano. The topics covered are:

Basic tuning kit
The tuning hammer
The tuning fork and rubber wedges
The metronome
The temperament felt strip

Chapter II: Using the tuning hammer
Introduces you without any further preamble in the art of piano tuning and teaches you its mechanics as it is done in practice. The topics are as follow:

Getting the “feel” and control
The right hammer, the right tips
Setting the pins
Setting the strings
Tuning hammer position
Careful not to break the strings
Summary

Chapter III: The main elements, parts and functions
This chapter examines the construction and the main elements of a piano. The idea is to give the student a clear overview of how a piano works. The chapter concludes with cut sections of Grand and Upright piano actions.

The main parts
The sound board
The frame
The cast-iron plate
The pin-block
The action

Chapter IV: Elementary theory, the basics you need to know
This section covers the basic elemental theory you need to know to tune a piano. Very important so that you can understand what it comes later. These are the topics

How the sound is produced
Harmonics and partials
How strings vibrates, the partials
The notes at the piano
Theoretical and real frequencies
The intervals
The unisons
Beats and pulses

Chapter V: Tuning practices
This chapter consist of a series of preliminary exercises to serve you as preparation before you undertake the full piano tuning protocol. You will study the three main intervals needed to set the piano equal temperament to perform a professional and accurate piano tune. You will also learn to tune unisons and octaves and judge by yourself the speed of the piano beat rates.

Tuning unisons
Tuning octaves
How to judge the speed of beat rates
The tuning fork, how to use it
The piano tuner scale
Tuning the main three temperament intervals
False beats, how to deal with them

Chapter VI: Standard piano tuning procedure
This is the fundamental and most extensive chapter of the book. Gradually you will learn how to build the temperament with step by step precise instructions. Here you have all the beat rates needed to build the temperament, conveniently recorded as mp3 files, so the student can easily recognize and judge the piano temperament beat rates without any query or doubt. This section also covers specialized topics of piano tuning like, how to raise the pitch, how to tune a piano to 442, how to do the “stretch”, and so on.

The temperament
Previous preparations
Setting the temperament
Advice and suggestions
Tuning the central section of the keyboard
Tuning the upper section
Tuning the bass section
The “stretch”
Stretch tuning, standard procedure
About raising the pitch
Raising the pitch, modus operandi
Tuning a piano to A442

Chapter VII: Important related topics
Being a piano tuner is not always easy. Sometimes we find ourselves in relatively uneasy situations. This chapter discusses the difficulties we may encounter and how to deal with them.

Tuning at a concert
Aural tuning versus electronic tuning
Specific electronic tuners, its main applications
Summary

Chapter VIII: Managing a piano tuner business, the best advice
This chapter is aimed to all of you who want to engage in piano tuning as a profession. A practical guideline on how to successfully manage your business as piano technician. The author of the book, gives specific advices and last recommendations for the future piano tuner, based on his own experience.

Promoting your business, get yourself known
Build a customer data base
The price issue
Exceptions to the rule
Learning to play the piano
Tune as many pianos as possible
Properly managing your working time
Building trust
The odd job
Piano tuning is a seasonal work
The best you can

Buy the two eBooks Now and save a 15% - Instant download!


$50,92 USD

Have you got any questions/comments about this book? Please, let us know.

© copyright 2011 Juan Olalla   All rights reserved    www.howtotuneapiano.com

About How to repair a piano eBook

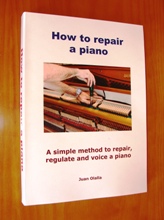
Learn to repair, regulate and voice pianos the professional way. This book “How to repair a piano” will be a great asset for beginers and/or advance students who also want to repair as well as tune their own piano.
Save lots of money in expensive repairs, and learn a skill that you can use to repair and service other people pianos. In addition, “How to repair a piano” will teach you not only to do repairs, but also so important aspects of the piano as regulation and voicing.

This book is the product of so many years of work. The techniques and methods exposed in this method are based on my own experience working as a piano technician for the last 32 years. As you will discover in this book, most malfunctions on the piano are easier to mend than they look at first sight so, why not to do it yourself. Learn the “tricks of the trade” and repair pianos in no time, I’ll show you how.


“How to repair a piano” Buy and download Now!

$29,95 USD


“How to repair a piano” main Features:

  • 132 pages divides into 7 Chapters comvering all the important issues
  • More than 140 pictures and helpful diagrams
  • Numerous tips and first hand advices
  • Full dedicated chapters covering regulation and voicing
  • A check list for quick reference with the piano most common failures

                            Table of Contents

Chapter I: How the action works 
Grand piano main sections
Note on cross sections nomenclature
Grand piano cabinet  nomenclature
Grand piano action cross section
Upright piano action cross section
Operation of the upright action
Upright wippen assembly
Upright action operation in four phases
How the grand piano action works
Grand piano wippen assembly
Grand piano operation in five phases 

Chapter II: The hammers, common faults and how to repair them
Basic tools
The virtues of “hot glue”
Repairing hammers and shanks
Changing a whole set of hammers
Modus operandi
Repairing a broken hammer shank
Flanges and bushings
Repairing a flange
Sluggish action parts
Repairing broken or damage bridle straps
Final notes and recommendations

Chapter III: The piano strings
Basic tools
Bass strings
Middle and treble section steel strings
Piano wire size number
Procedure to replace a string
Restringing a piano 

Chapter IV: The pins and the pinblock
Pinblock cross section
Pianos that don’t stay in tune
How to repair a loose pin
Pinblock tightener 

Chapter V: The keyboard, the keys
Most common fault
Determine where is the problem
Fixing a sluggish or sticking key
Keys rubbing on the key slip, a classic
Replacing the key bushings
Repairing a broken key 

Chapter VI: Regulating
Understanding regulation
Regulation tools
Basic preparations

Regulating the upright piano
General alignment and squaring
Check and align the travel of the hammer butt
Check and align the hammers to the strings
Check and align the jacks to the hammers
Aligning the backcheck
Regulate hammer stroke
Regulate lost motion
Regulate the average key height
Regulate hammer let-off
Regulate key dip
Regulate hammer checking
Regulate the pedals
Regulate the dampers
Regulate the damper spoons
Regulate the bridle straps
Final note on regulating the upright piano 

Regulating the grand piano
The let-off regulation rack
Basic preparations
Spacing and levelling the keys
Regulate the travel of hammers
Align hammers to strings
Regulate the jack to the hammer roller
Adjust the height of the repetition lever
Regulate the hammer height
Regulate the hammer let-off
Regulate the hammer drop
Regulate the backchecks
Regulate the repetition lever spring
Regulate the dampers
Adjust the height of the damper stop rail
The grand piano pedals
Regulating the grand pedals  

Chapter VII: Voicing
Understanding piano voicing
Voicing tools
The voicing technique
Voicing procedure
Voicing for “strong”
Voicing for “soft
Comprehensive hammer voicing
Voicing the last treble octave
Final notes on voicing 

Action problems summary quick reference
Note is too weak
Note doesn’t sound at all (dead key)
Hammer strikes the strings two or more times
Hammer gets blocked against the strings
Sluggish and “lazy” notes
Notes “clicking” noise
Dampers unable to damp

Buy the two eBooks Now and save a 15% - Instant download!


$50,92 USD
Any questions about this/these books? Please, let us know.

Copyright © Juan Olalla 2011

Five powerful reasons why you should also learn to tune your own piano

Due to proven easy and fast piano tuning methods like “How to tune a piano” nowadays increasingly more people tune their own piano. The benefits for doing so are well clear. Read the following 5 powerful reasons.

1  Money!
Just imagine the amount of money that you will save over the years if you tune and service your own piano. For the price of a single piano tuning, you can buy a piano tuning method like “How to tune a piano” and also a reasonably good quality tuning lever with mutes, that’s all you need to start tuning your own piano, and will probably be the last money you spend in piano tunings.

2  Have your piano always in tune
Although the first reason for tuning your own piano, Money! seems pretty convincing, the number one benefit that you will get from learning to tune your own piano is having the piano always perfectly tuned. Have your tuning lever at hand and keep your piano always in shape by touching up the tuning between professional visits, or if so you wish, tune the entire keyboard right from scratch.

3  Understand and appreciate your instrument
For most people, the way a piano works is a total mystery,  even professional players or teachers don’t have a clear idea of how the piano works. Knowing and understanding the mechanical aspects of your instrument and been able to tune it and service it, will greatly increase your understanding and appreciation of the instrument and will enhance your skills as a piano player.

4  Get respect and admiration by friends and other fellow musicians
People in general regard piano tuning as a very rare ability only within the capabilities of a gifted few. The reality is well different, piano tuning is not even a music skill, but a mechanical one within the reach of most people. If you can tune your piano you will be no doubt admired by friends and other fellow musicians who will certainly regard you as “smart”.  

5  Tune not only your piano but also other people pianos.
I can assure you, as soon as people (friends, neighbours, etc.) know that you can tune pianos, in no time they will start calling you (that is the way I started my business many years ago). Of course, you can and should charge for your work, so you could convert your hobby in a part time profitable activity that you could combine with your job or studies.

Copyright © Juan Olalla 2011

Has this post been helpful to you? Do you have any question? You are welcome to leave a reply, your opinion and/or suggestions are highly appreciated. Thanks