Learn to tune a piano aurally, what follows is the standard protocole. First of all, you will need some basic tools, these you can buy at any online tool suppliers on the internet. You could buy everything as a piano tuning kit or you can buy them individually.
What ever way you choose, make sur e you buy the right tools. If possible try to buy good quality piano tuning equipment, that way you will have better overage results and your tuning will be easier and more accurate.
Piano tuning tools
A set of basic piano tools is not too expensive, certainly no more than a standard professional tuning.The first thing you obviously need to learn to tune pianos, is a piano in a reasonable good state. Bear in mind that some very old ones specially if they still have wooden frames are simply not tunable, so better disregard those ones as they will make the tuning very difficult or practically impossible. The piano can be old but must hold the tune, that means it must be in a good enough condition to stand a standard A-440 tune and hold it for some time. Also better to choose a good size one. Big uprights and grands are easier to tune than spinets and small uprights.
-
The tuning lever or hammer
A whole chapter could be writing about the tuning hammer, this is the most important piano tuning tool. I think you could consider to buy a good one, no doubt it’s a good investment. The extended ones with changeable heads and tips are the best ones. A good tuning lever is far better than an ordinary one, makes the job easier, more precise and professional.
-
The tuning fork and two rubber mutes
An ordinary tuning fork A-440. You can buy them at any musical instrument shop. The tuning fork produce an exact pitch that you will use as a basic reference. The rubber wedges you can buy or make then yourself. The utility of these simple rubber wedges is to mute the strings we don’t want to hear.
-
Felt temperament strip
Better to have a couple of these. They are strips of felt about two or three millimetres thick by two or three cm (one inch) wide and about a meter long. We will need then to set the temperament which is the first thing we do when tuning a piano.
-
A metronome
Any metronome will do, but one of those small digital ones would be perfect. A metronome will be very handy in early learning so that we can practice and check the accuracy of the beat rates we use when tuning a piano. When we are accustomed to hearing and recognizing the beat rates, then will not need the metronome anymore.
Disclaimer: What follows is a basic and general information procedure for tuning a piano. To view the full protocol and specific piano tuning instructions, please refer to eBook “How to tune a piano”
The temperament could be defined as a group of notes in the center of the keyboard, stretching appro
 ximately one octave (normally from F33 to F45 or from F33 to A49) that are tuned in a certain way. Once the temperament is set we will use it as a reference to tune the rest of the keyboard.
-
First step
Mute the unisons Mute with a felt strip the side strings of every unison from F33 to F45 (see the picture above). Leave unmuted the center strings as this will be for now the only string of every unison in the temperament that we will tune.
-
Second step
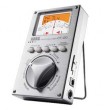
Using the tuning fork Tune A4 to its theoretical standard pitch 440 htz. You will need a chromatic tuner with speakers that can generate that frequency or an A-440 tuning fork.
-
Third step
Tuning the temperament. Now tune the temperament. The standard way to tune the temperament is using third, sixth and fifth intervals and tuning them to specific beat rates, save fifth and fourth interval for testing. If you prefer or feel more confortable, you can do the other way around as there is not rule of thumb in this matter. At this stage, the center string is the only string at every unisons in the temperament that you will tune.
-
Forth step
Tuning octaves. Tuning octaves is fairly simple. Tuning hammer on F#46 (mute the side strings with a couple of rubber wedges). Strike at the same time F#34 (already tune) and F#46. Tune till you eliminate all audible beats and the two notes sound as a single one. Then tune G47 in the same way and carry on tuning every note towards the upper end of the keyboard. When tuning the bass section apply the same procedure.
- Fifth step
General review Review and test what you have just done so far. Take special attention to the unisons as they are the ones that first go “out of tune”. Try to eliminate all the audible beats or at least get them as beatless as possible. A good hammer skill would be handy at doing so.
Doing the stretch
It’s a matter of fact that a piano sounds better when its upper section and low section are stretch. That means that the high notes (more or less the last two octaves) are tuned sharper than theoretically they should, and the very low notes tuned lower than they also should be. You could ask, why is that? The reason is that a piano tuned in that way simply sounds better. That is commonly accepted, so an experience technician should do what is called “the stretch”.
The “stretch” is tuned exponentially, that means that the stretching becomes more and more pronounced as you advance up the keyboard There are theoretical tables that allegedly determined the amount of “stretch” for every key, but that’s all. In this matter like in many others involving piano tuning there is not rule of thumb, and in reality every tuner do the “stretch” at his/her discretion. I think, to be precise, when in the lower notes the stretch shouldn’t be call that way, but the “shrink”, as that’s what really happens.
To do the “stretch” you will need some practice and experience. If you are newbie to piano tuning I don’t recommend you try doing the stretch, at least not for now. Just wait some time till you are reasonably proficient.
Important notice: Reproduction of this article (or any other article contained in this site) in part or in whole is strictly prohibited, unless permission is given directly by the copyright owner. Contact Juan Olalla at: [email protected]
Has this tutorial been helpful to you? Do you have any questions? You are welcome to leave a reply. Your opinion and/or suggestions are highly appreciated. Thanks
© Copyright Juan Olalla 2011 All rights reserved www.howtotuneapiano.com